GoDaddy
Installation Steps
Godaddy (ECWID)This integration must be on Goddday ECWID website base only.
Kindly, follow the below steps for installing the GoDaddy extension:
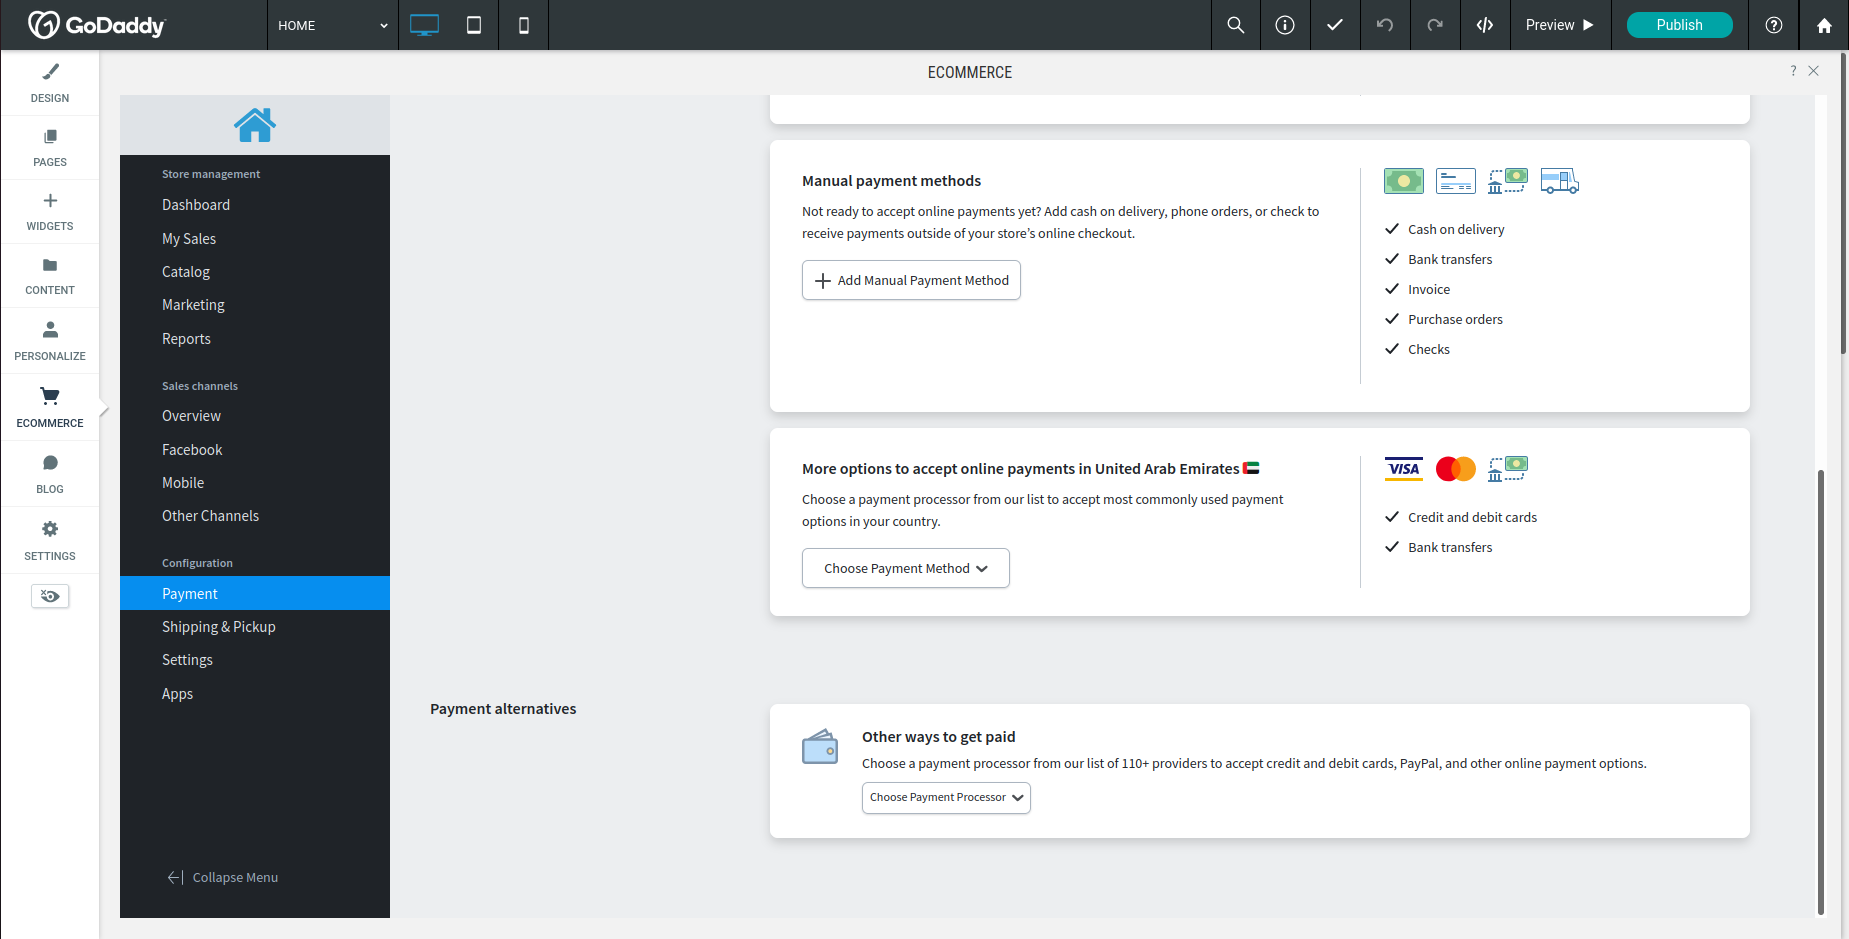
- Log into your GoDaddy admin panel, go to ECOMMERCE, then press the Manage store button.
- Navigate to Payment and scroll down to More options to accept online payments in {the website country} section.
- Select MyFatoorah from the Choose Payment Method list.
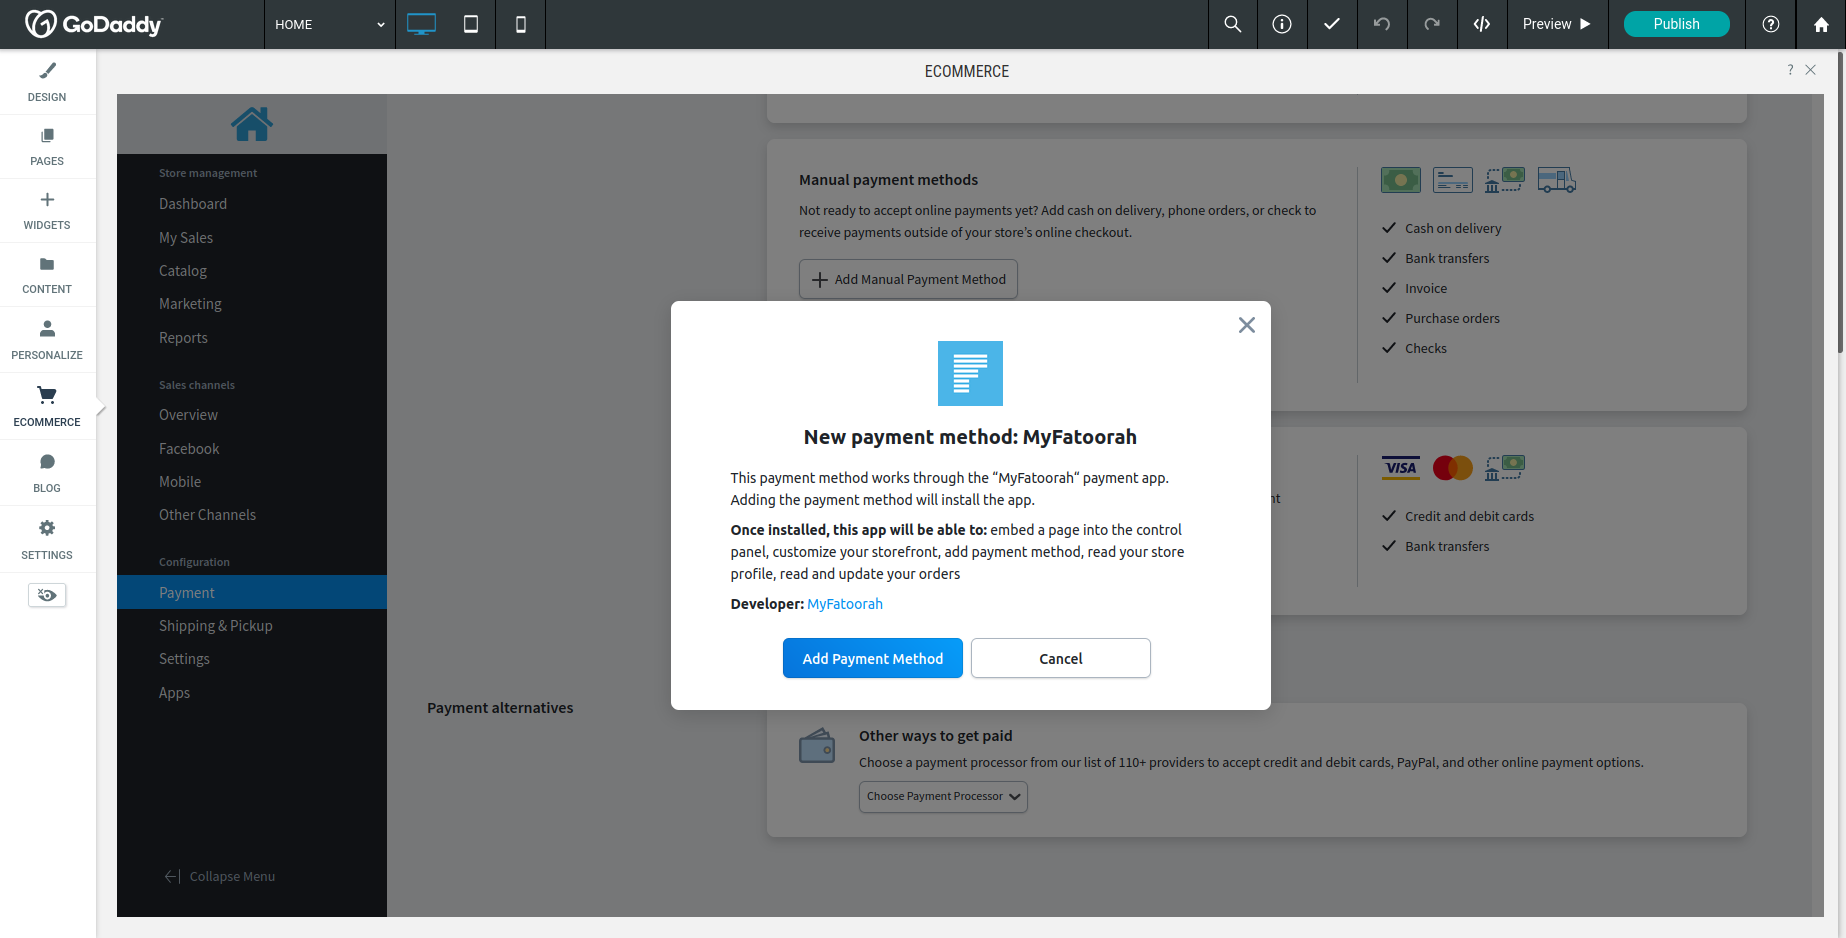
- From the New Payment Method: MyFatoorah popup window, click on Add Payment Method.
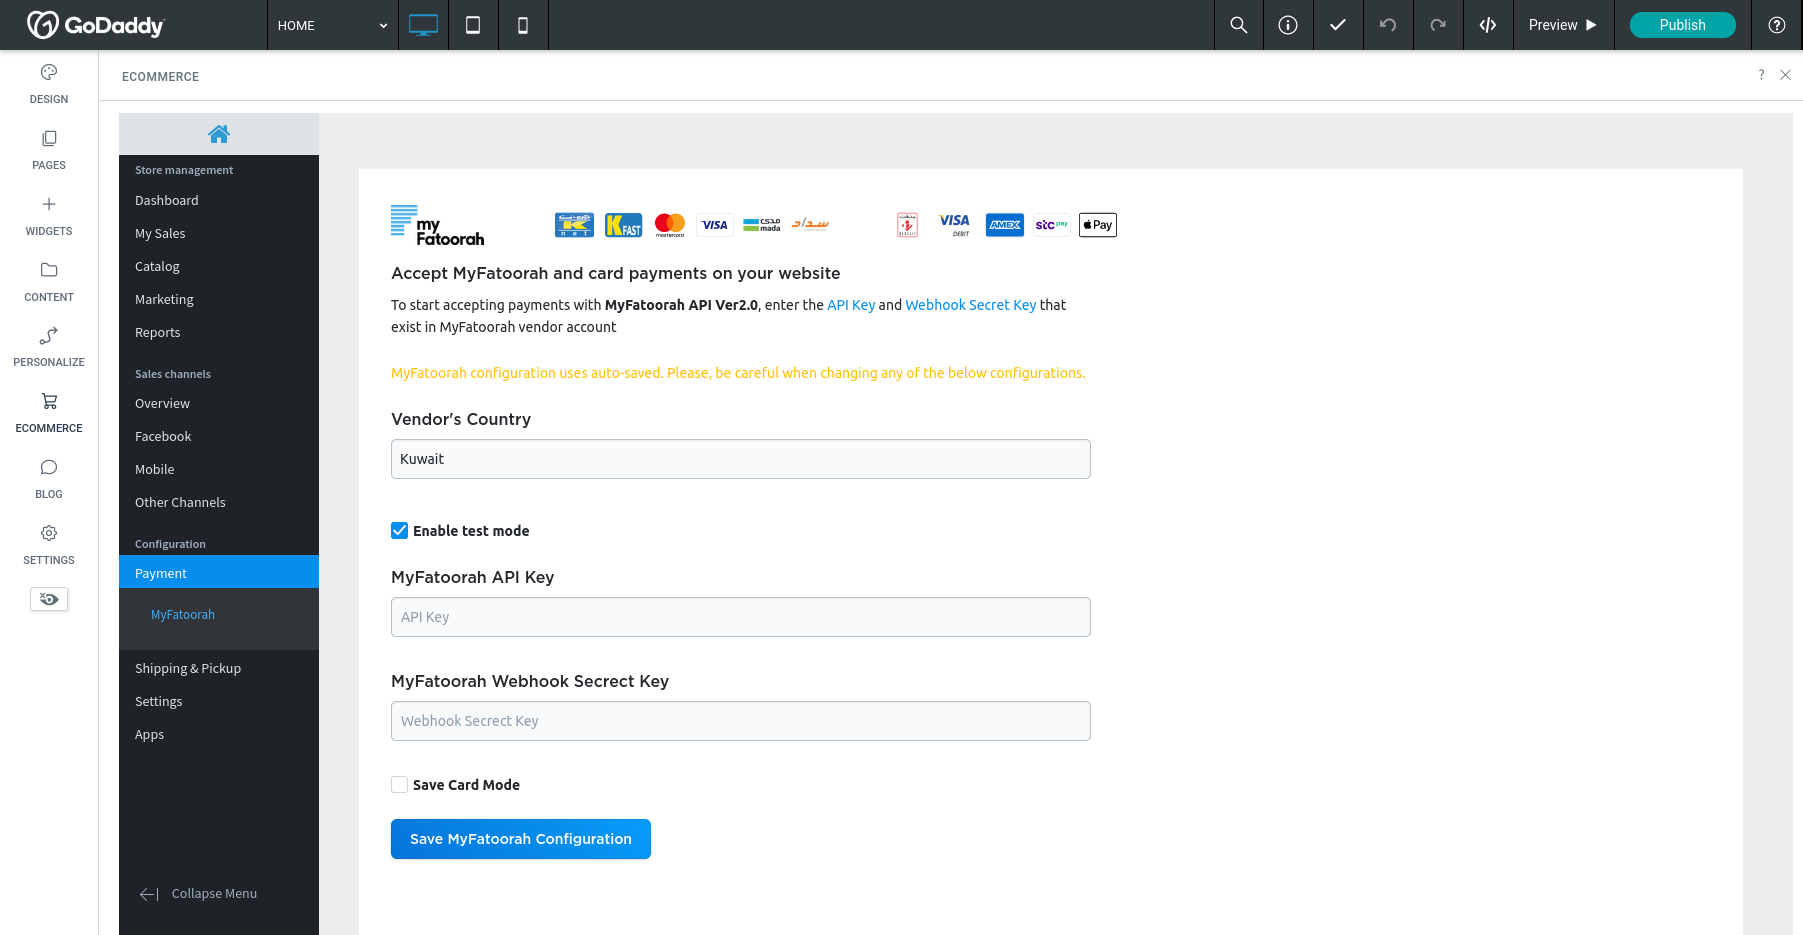
- MyFAtoorah Configuration page will appear to enter your information as described in the next section.

Step 2 & 3

Step 4
Merchant Configurations
In GoDaddy Admin Panel, configure the plugin with API key credentials as follows:
- Log into your GoDaddy admin panel, go to ECOMMERCE, then press the Manage store button.
- Navigate to Payment → MyFatoorah
- Select the Vendor's Country.
- Mark the Test Mode checkbox if you are on the test mode.
- Fill in the API Token Key.
- Add the Webhook Secret Key (optional).
- Click on Save MyFatoorah Configuration.

Demo Configuration:
Please, enable the test mode and use the test token.
You can use the list of test cards to explore the payment process.
Live Configuration:
Please, disable the test mode and use your live token.
Updated 3 months ago
